Jim's Jobs Classic - User Manual
Welcome to Jims Jobs Classic!
What is Jim's Jobs Classic?
Jims Jobs Classic is a computer management system developed by the Jims Group of Companies. It is designed to manage the customers, jobs and finances of a servicing business. Although it was initially developed primarily for mowing business, our intent is to make it broad enough to be used by our many other divisions.
This manual is not intended as an exhaustive manual of the program. Rather, it is designed to provide you with an introduction to the basic functions to get you up and running as quickly as possible. We’ve tried to make Jims Jobs as intuitive and as user-friendly as possible. Hopefully, many of the functions can be easily understood without the need to continually refer back to the documentation.
1. Getting started.
System requirements
Any modern PC from within the last 10 years or so will be capable of running Jim's jobs classic.
The following is recommended as a minimum for running Jims Jobs Classic:
- Windows 98 or above
- 133 MHz Pentium
- 64 MB RAM
- 50 - 80 MB free on your hard disk
- CD-ROM or Internet connection
- VGA or higher – 800 by 600 resolution is strongly recommended!
- Printer if invoices are required
- An internet connection is not required but is strongly recommended. That way you can receive updates of the program via email, and also get technical support via email as well.
Getting hold of Jims Jobs
The easiest way to get hold of Jims Jobs is to download it off the website. It is available for download here or by browsing to https://www.portal.jims.net and using the search box on that page to search for Install Jim's Jobs Classic
This page also contains some basic information about the program, link to the setup program, link to the latest version and other components of the program, FAQ, etc.
Installation
If you downloaded Jims Jobs from our website, the installation program will begin when you run the downloaded file.
The installation program is reasonably straightforward and does not require much input from the user. You may be required to reboot your computer as part of the setup process.
When the setup program has finished, you’ll be able to open Jims Jobs by clicking the Windows key on your keyboard and type in Jims Jobs. Select the program from the list that is then displayed.
Initial setup tasks
If you've never done this before, you will need to go through a few tasks to initially set-up your details. Enter setup off the main menu, then work your way through:
- Your Personal Information
- Services Provided
- Employee's
- Miscellaneous Settings
- Financial Settings
- Technical Settings
- Miscellaneous
These are all easy to follow and you should go through each of these buttons and enter your information as you go.
If you’ve just upgraded from another database format, you can use the heading Clients to view your client files and confirm that their information is correct. If you haven’t upgraded your database from anywhere, then you continue as below.
When you’re ready to continue return to the Jims Jobs main menu!
2. Clients
Adding new clients
To add a new client, click on the Add Client option…
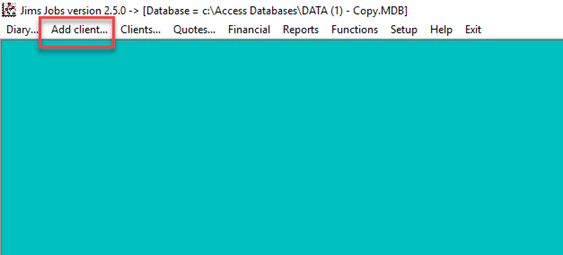
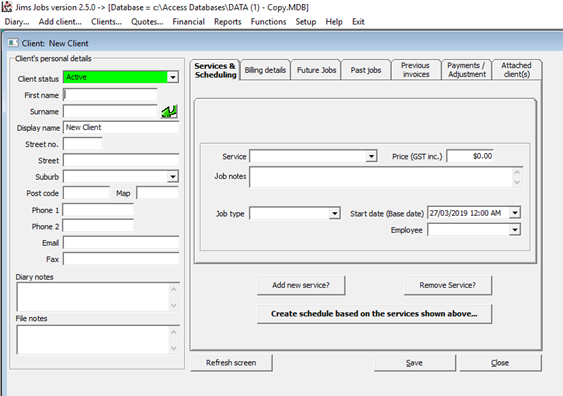
This will display a blank client screen, where you type in the relevant details about what kind of client they are, what their details are, when you service them, and how you want to bill them. This is described in more detail shortly
Finding existing clients
If you wish to view or edit an existing client, click on Client. This will bring up the main screen which will display all the clients you have previously entered.
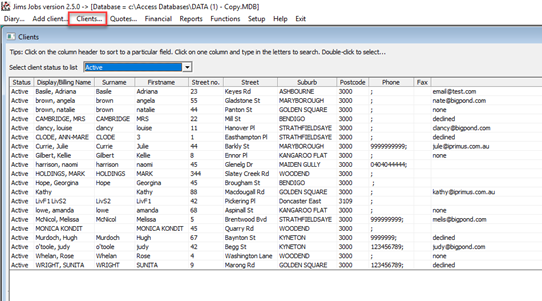
To locate a client, select whether you are looking for an active client, bad debtor, billing address, cancelled client, transferred client or all clients as appropriate at the very top, you can then drop down through the list and select the client with the mouse.
Preferably you would click on the column header to sort to a particular field. You can locate a client by any of the column headings. Whichever column you highlight (double click), the detail in that column will present alphabetically/numerically. If you type w it will skip straight to the w's, type c and it will take you back to the c's. This is extremely helpful if are looking for a client and you know that their first name starts with a J or they live in Bayswater. When you have selected a client, you’ll be able to see their detail as shown below.
Remember you can use this screen to bring up previously cancelled or transferred clients, by selecting a “cancelled client" or transferred client at the top. This lists all of those clients, which are not normally shown otherwise.
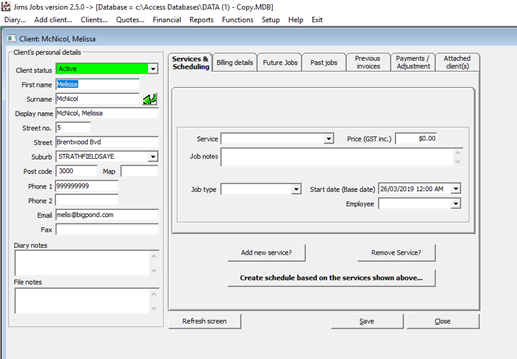
Client details
The Client details area contains the client’s status and current contact information, and an area for general notes about the client (Please refer to figure 2.4)
You can edit any of the details, and whatever you change will be saved automatically once you Close & Save. Clients can have one of the following statuses:
Active: this means you’re doing work for them. Most of your clients will be active. (Whether they are regular or casual is specified under Services and Scheduling - section 2.4)
Quote only: you have quoted the client, but, they have not accepted or rejected the quote. You’re waiting to hear from them. Please refer also to Quote section.
Quote rejected: you did a quote for them, but they didn’t accept the quote. You can keep them in the system purely for record keeping purposes or to follow up at a later date. Please refer to Quote section.
Bad debtor: this client isn’t paying their bills, and you don’t want to schedule any more jobs for them.
Cancelled: you’ve serviced the client in the past, but they’ve since cancelled the service. These clients don’t normally appear on your clients list – if you want to access them go to the Clients screen and select client status Cancelled.
Billing address: this client may be a corporate client or a private rental property owner, where you service several addresses but just bill the one address. Or, it may be in the system because you send an account to a different address to your service address (ie. PO boxes, etc).
Transferred: the client is now being serviced by another operator.
Services and Scheduling
Information about a client’s schedule, servicing, regularity and pricing is accessed through the Clients screen under Services and Scheduling.
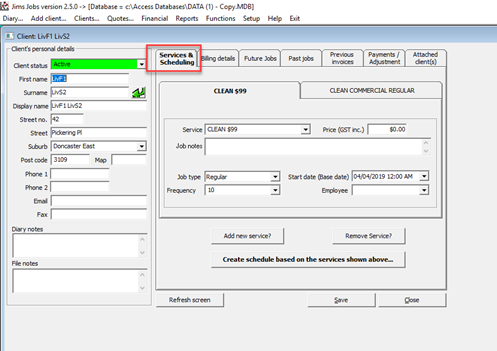
You can specify which service or services you are providing to a specific client, how much you normally charge them, and how frequently you will be doing those services for them.
If the client has requested a service be done on a regular basis (eg. once a fortnight), select Regular as the job type. You can then specify the date of the next job, and also how frequently they want the job done. Jims Jobs will automatically schedule jobs in the future based on this information
If you’re not going to service the client on a regular basis, however, you can specify the job type as Casual instead. This lets you specify the date of the next job only, and Jims Jobs will automatically schedule just that one job.
Occasionally, the client may have requested several services to be done. If so, click the button "Add another service". You can then enter the details of the extra service. Usually, this other service will be done at the same time as the first one and will have Same schedule as MOW-R selected. However, if the service is provided on a different schedule, select Different scheduling, and you’ll be able to specify separate scheduling details.
Billing details
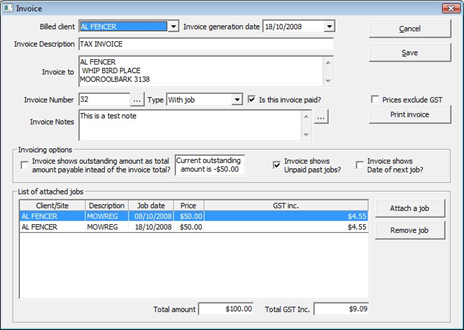
Finally, you can specify how you want to bill the client, by going to the Billing Details section. This area contains information about who you want to address the billing invoice to, how much money the client owes you, as well as information for work-cover clients.
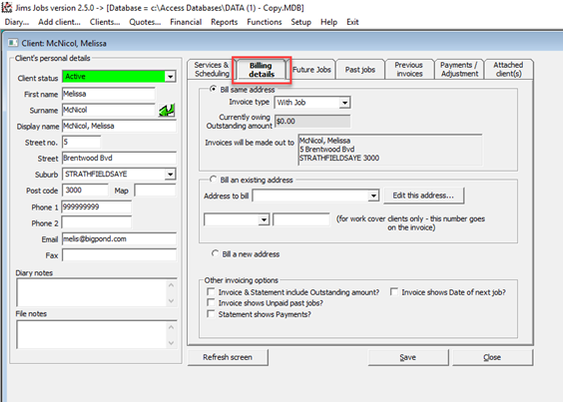
Most of the time, you will give the billing invoice to the same person you are servicing, and thus you’ll want to specify Bill same address. Invoices generated will be addressed to that address.
You can choose to bill on a per-job basis (one invoice for each job you do), or, you can bill on a monthly basis (one invoice per month, with all the services on the same invoice.)
Sometimes, however, you’ll be servicing one address, but billing a different address. If this is the case, you can select Bill existing address or Bill a new address.
(If you already have the billing address recorded in the system somewhere, you can select Bill an existing address. Then you can select the address you want to bill by selecting the appropriate client in the drop-down box. If you’ve never entered it previously, select Bill a new address instead and you’ll be able to enter the details of the new billing address)
Note: For work cover clients, specify the work cover company’s address as the address to bill, and then you can enter the claim number of the client underneath. This number will be printed onto the invoices.
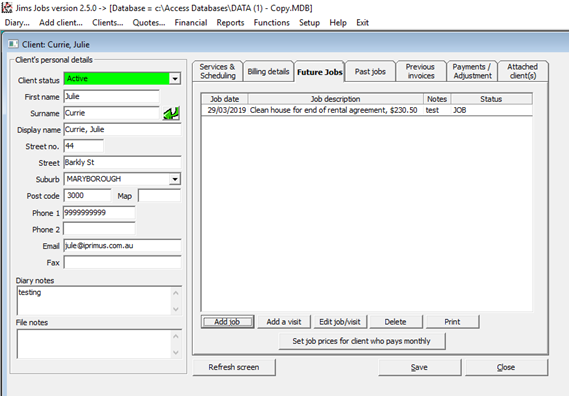
Future Jobs
All information about a client’s regular and casual work schedule for the next couple of months is accessed through the Clients screen under Future jobs.
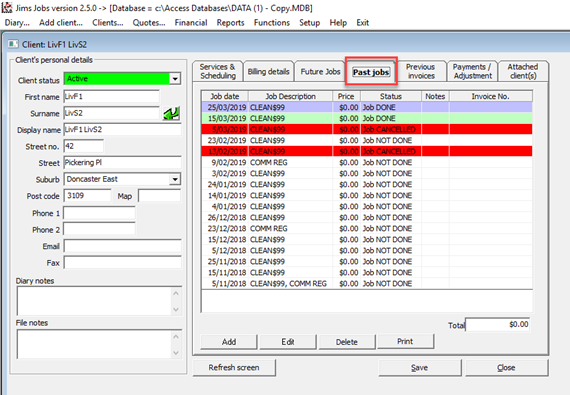
Past Jobs
Information about a client’s previously serviced work schedule for the last couple of months is accessed through the Clients screen under Past jobs.
Previous Invoices
Information about a client’s recent invoicing history is accessed through the Clients screen under Previous Invoices.
Payments
Information about a client’s recent payment history is accessed through the Clients Screen under Payments.
Attached clients
Information about the linked client’s i.e. Corporate, Real Estate or multiple property owners can be accessed through the Clients screen under Attached clients.
3. Jobs
Jims Jobs allows you to keep track of your daily job schedule, schedule future work for the next day, next week or next month as applicable. You can also record what jobs have been paid for and which ones are outstanding.
Viewing and printing your daily worksheet
The Diary screen allows you to view your daily worksheet, shuffle jobs around, and print out invoices for upcoming jobs. To open the diary, click on the Diary option in the top left-hand corner of the main screen.
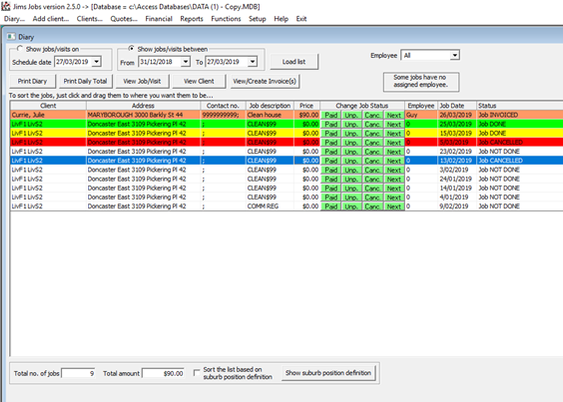
To view a specific day, other than current date go to “show jobs/visits on” select “schedule Date” scroll forward or backwards through the calendar to appropriate date and click.
To print out your run sheet, click Print Diary. The print-out is in a format suitable to take with you on the road and allows you to tick off jobs as they are done or to make notes for future work. To print for an employee, just select the name of the employee from the selection and print the Print Diary button.
Actioning off jobs at the end of the day
At the end of the day, you should always record what happened to each job – whether they paid you, if they didn’t pay you, or if the job was postponed/cancelled or amended for whatever reason. You should always record if any extra work was done or is planned to be done in the future.
To record any extra work done, select the appropriate client (double click) on that client.
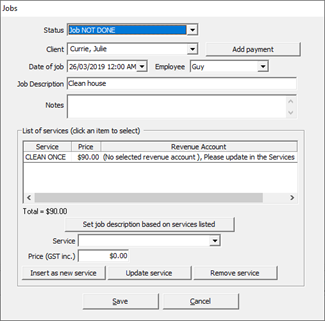
If any extra work was done, go to the bottom of the screen, click Service, scroll down and highlight the appropriate service and then specify the price. You can do this several times if you provided multiple services. You can also change any other details of the job such as price, date, or notes. You then need to specify whether the job was paid, unpaid or cancelled.
If you did a job, and the client paid you on the spot for it, click on Add Payment. This brings up a screen that allows you to specify the details of the payment.
On subsequent visits the information should all be correct and you can click Save & Close to continue. For cheque payments you will still have to enter the new cheque details.
If the client however was not home or did not pay you on the day, when you change the job status to Job Done go straight to Save & Close, do not click view payments option. Jim's Jobs will automatically record the amount as outstanding against the client, when you Save & Close.
If the job was cancelled for any reason, you can click Cancelled to mark it as cancelled and to remove it from the schedule
Tip: it’s best to record any extra work that you did before you enter payment options. This will keep the accounting clearer.
Scheduling jobs to be done
There are several ways to schedule jobs to be done, depending on the situation. The best way is to enter the client screen, select the client, select Services and Scheduling (figure 2.6), as described before (under Services and Scheduling tab). Enter the service, price, regularity and date as arranged with the client.
Another way to add jobs is to go to the Client menu, select the appropriate client, and select the Future Jobs tab. Select either Add Job, Add a visit, or Edit Job/Visit as applicable and enter details as appropriate.
After you enter the service, price and date details of the job, and click Close & Save. The job will then appear on your schedule for whatever date you have specified.
For regular clients, you also have the option of rescheduling the jobs after that as well. For example, a client may request to be serviced every 3 weeks instead of 4, or on Thursdays instead of Wednesdays. In this situation, select the appropriate date for the next job, tick Regular as the job type, and change the frequency from 28 to 21 days.
“Backdating” jobs that have already been done
Occasionally, you may want to record jobs that you’ve already done in the past for accounting purposes. To do this, add a normal job into the system by going to Client, locating the client, and going to Past Jobs tab. Enter details of a past job, when you’re entering the details, remember to change the date to be whatever date was appropriate in the past.
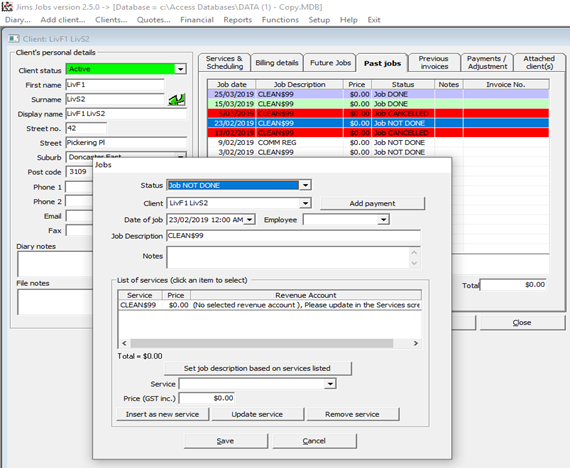
Also, make sure you mark off the job as Paid if it has been paid, to “action it off” or Save & Close if unpaid.
Viewing past and future jobs for a client
To view a list of jobs done or scheduled for a particular client, select that client on the Client screen. You can then choose to view Future jobs or Past jobs tab.
Future Jobs tab - This area allows you to manage all future jobs for the selected client. You can change dates or notes of jobs, add new jobs, and also add visits. A visit that is scheduled will appear on the daily worksheet, but no work will be associated with it.
Past jobs tab - To view previous jobs for a client, select Past Jobs tab. This screen displays previous jobs that you’ve done. By observing the job status and colour you can quickly confirm whether the job was done if they have paid or are still outstanding.
4. Quotes
Creating a quote
To create a quote for an existing or a prospective client, select the Quote option. The quote screen then appears.
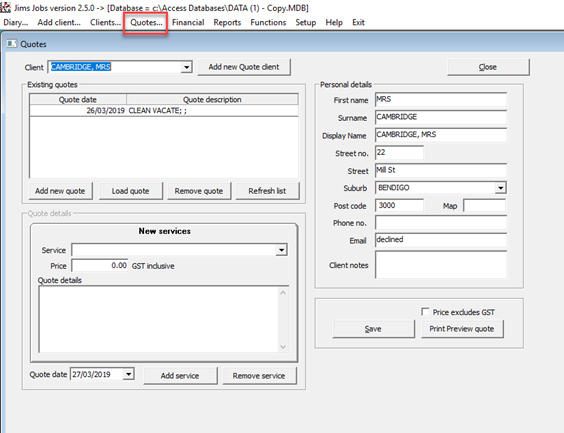
To add a new quote for an existing client, press the button in the client area. All your clients will be displayed scroll down till you locate the required client and double click. This will display your client’s details on the right hand side of the screen.
To add a new quote, for a new client, select the Add new Quote client. This will display New quote on the right hand side of the screen. Enter new details as previously discussed.
To edit or reprint an existing quote, select a quote from the list and click on Load quote. You can add or remove a service or edit the details of the quote.
When all the necessary details are entered, click on the Save button.
To print, click on the Print review quote button.
To delete an existing quote, select and load the quote before clicking on Remove service.
5. Financial
Payments received
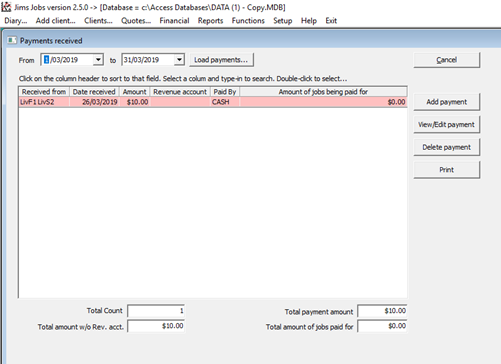
The Payments Received screen allows you to find payments, record payments, edit payments and delete payments you get from your customers.
You access this by clicking on the Financial menu and then Payments Received.
For the convenience of the user, there are several other ways you can also record a payment. From the Diary screen click on the client then select the “Add payment” button on the job screen.
Alternatively, you can record a new payment that you have received from the Client screen by selecting Client, click on payments button, you can then specify how much it was, and any other relevant detail.
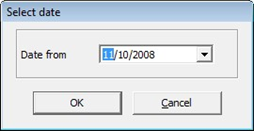
If you wish to view the details of an old payment, you can locate it by clicking on Payments Received and selecting the relevant date range. This will list all the payments received for the specified date range. Doubleclick on the payment you’re looking for and it will be displayed.
Finally, you can delete the record of a previous payment in case of an error. Locate the payment as described above, and then click on Delete payment.
Debtors/Creditors
A client becomes a debtor when the amount owing is greater than $0.00. Amount owing is computed using the formula: Total amount of jobs done minus Total amount of payments received. Negative amount owing puts the client in the list of clients who owe you.
To view a list of people currently owing you money, click on Financial and then Debtors/Creditors.
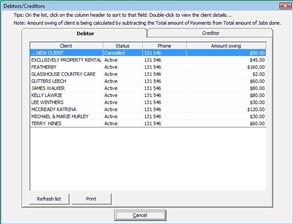
A printable version of this is available by clicking Print grid, or to obtain a more detailed report you can access Reports, go down to Debtors/Creditors and sort by Name, Amount Owing or Number of Days as a Debtor.
To identify those clients who have a payment credit, click on Financial and then Debtors/Creditors, this time select Creditors. Clients in credit will be identified by -$, these clients may have paid in advance or received credit for whatever reason.
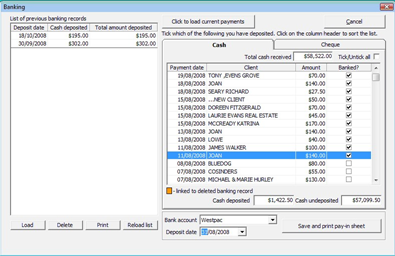
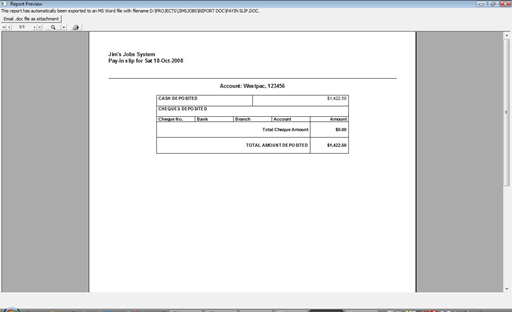
Banking
The Banking screen allows you to control the trail of your cash and cheque payments into your nominated bank account/s.
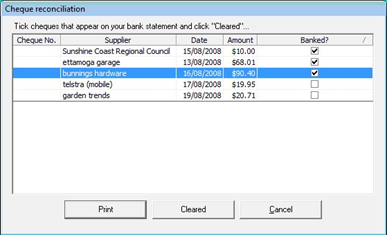
Cheque reconciliation
Allows you to record that cheques you have written to your suppliers have been presented and cleared as confirmed against your bank statement.
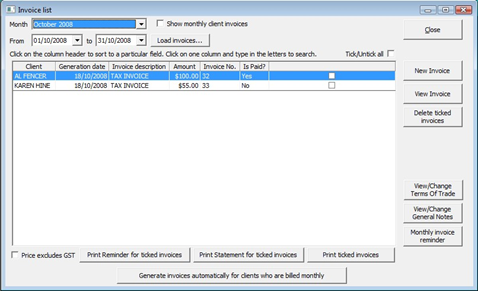
Invoices, Statements & reminders
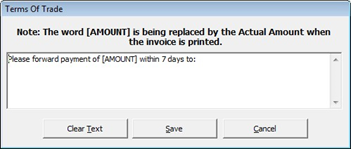
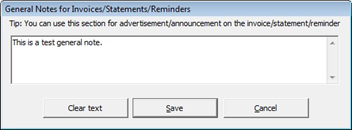
From this screen you can access any date range you desire, set a monthly date or select a From - To date of a week, fortnight or any other period as you may require. Create a new invoice, view an existing invoice or delete a marked invoice as well as view/change general notes and monthly invoice reminders. You can also Print a Reminder or a Statement for a ticked invoice as well as Print ticked invoices and invoices for those clients billed monthly. Texts printed on the invoice e.g. Terms of Trade, General Invoice Notes, can also be set
Purchases made
You can enter purchases made by clicking Financial and selecting Purchases, you can refine the search by narrowing the date range or by highlighting a specific date, then select view/edit as below: 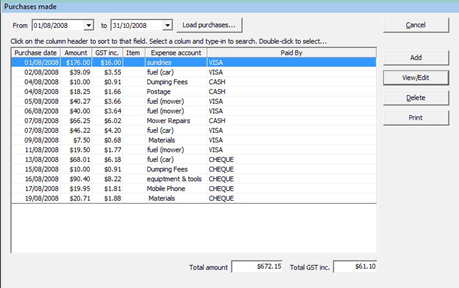
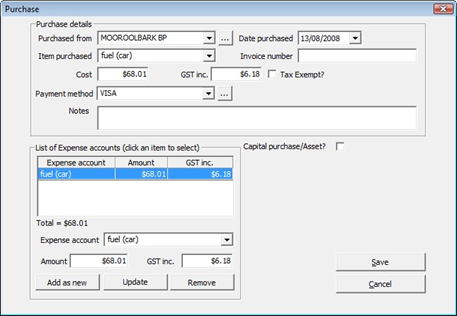
To record a new purchase you’ve made, click on Record new purchase. Then, you can fill in the rest of the information regarding the purchase such as the item, date, cost, and so on.
If the purchase made was a capital expense, when you tick Capital purchase/asset, you will have the option of specifying further information specific to that purchased item. At any time you have the option to press view/edit to go back in and correct any information supplied.
To view previous old purchases, just extend the “Show purchase from” date range. Select the purchase you’re after then click OK, and you can view and/or edit its details.
You can also delete old purchases if they were made in error by finding them in this way and then clicking the Delete option.
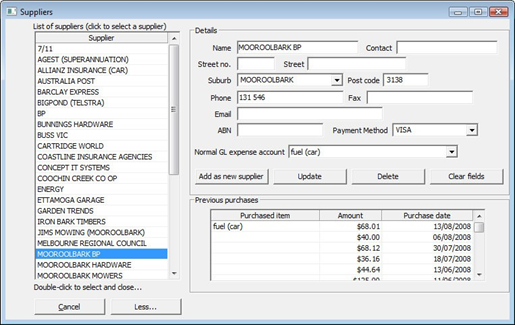
Suppliers
You have to identify and enter your preferred suppliers so that this information is available prior to recording your purchases.
Jobs
Select Financial, Select Jobs to check work done on any date, or you can select a forward date to view upcoming work.

6. Reports
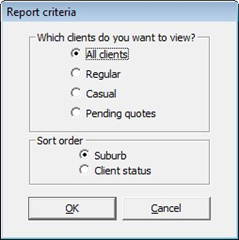
Clients
Produce sorted lists of your client base as per the example below:
Bad debtors
To view all your bad debtors, select Reports, then select Bad debtors. If you are doing everything right, this should be a very small listing.

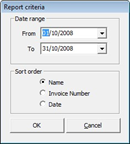
Invoice List
Produce sorted lists of your invoiced client base for any date range, sorted by Name. Invoice number or Date, as per the example below:
Jobs List
Review lists of jobs done for any date range of your client base as per the example below:
Overdue Jobs
List all overdue jobs from any selected date as per examples below:
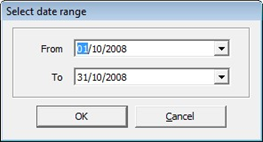
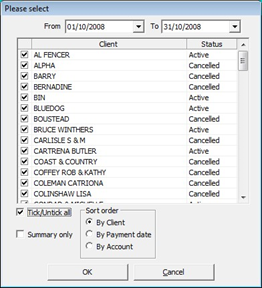
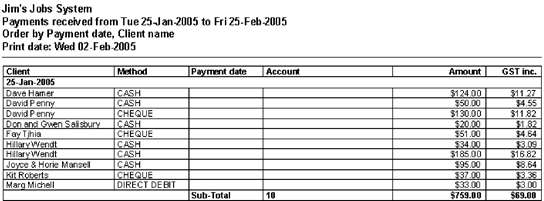
Payments Received
Produce sorted lists of your client payments for any date range, sorted by all clients or only selected clients, or by account, as per examples below:
Work done for clients
Select Reports, Select Work done for clients as for Figure 6.7 above, then select Ok. This will display the work undertaken for those clients you have selected for the date range you stipulated

GST
To view your GST position, click on Reports and select the GST report. This report takes all the payments and purchases you’ve recorded for the date range you have selected and calculates how much GST you must pay or are owed.
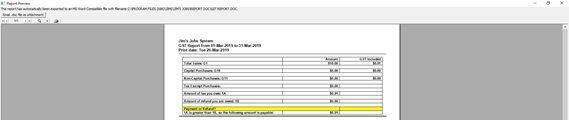
This report can be generated for any period – monthly, quarterly, or yearly, depending on the date range you specify.
The letters G1, G10 and so on directly match up to the Australian Business Activity Statement fields, so generally you can copy them directly in to the appropriate boxes.
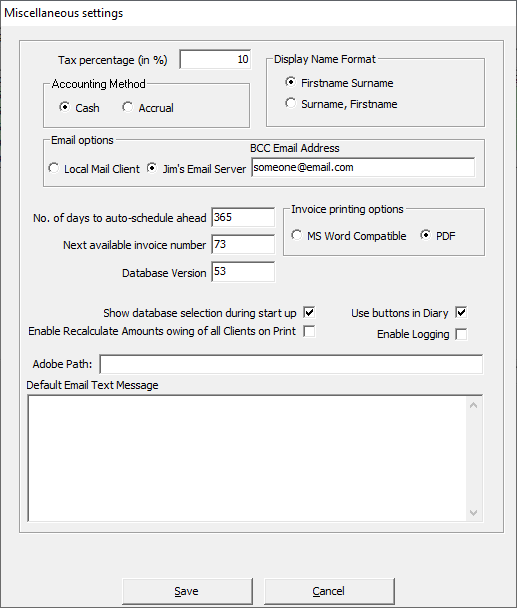
Note: the GST rate is 10% by default. To change this, go to Setup and then Miscellaneous settings and enter the appropriate percentage.
Debtors/Creditors
Produce sorted lists of your Debtors/Creditors for any date range, sorted by Name, Amount owing or No. of days as debtors, as per examples below: 

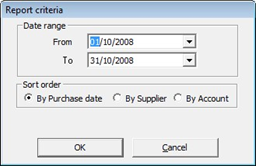
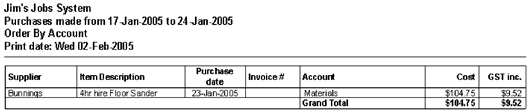
Purchases made
Review purchases made Weekly, Monthly, Quarterly or for any date range, by purchase date, by supplier or by account.
Assets
Review Asset purchases made during the Financial Year.

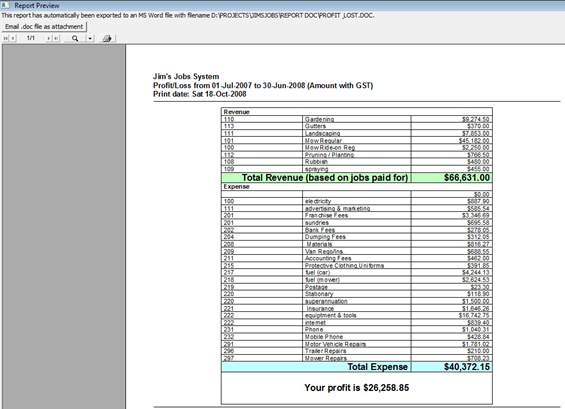
Ledger accounts (Profit/Loss)
Review your profit or loss for any specified date range as per the example shown below.
Unpresented cheques
Any cheques written by you, against your account will appear in this section until you complete a cheque reconciliation in the Financial section against your cheque book.
7. Functions
Restore Backup
To restore a backup, select Functions, select Backup, select Restore backup, select a backup file from the list or you can search for the file by clicking on the Search for other backup files button.
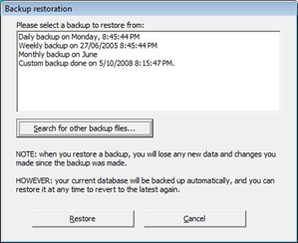
Search and select the file you want to be restored. When the restore is successful, the system will ask you for a restart of the program to start afresh.
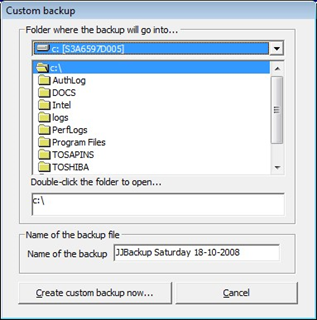
Create Custom Backup
To create a custom backup, set the folder where the backup will go into. Enter the file name of the backup then press Create Custom backup now...
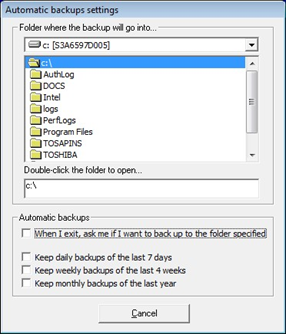
Automatic Backups
Set the folder as for custom backup (above). You will have to stipulate if you want to keep daily backups for the last 7 days, weekly backups for the last 4 weeks, or monthly backups for the last 12 months.
Create New Database of All Transferred clients
This function is intended for franchisees that sell a territory or split. The purpose is to provide a database of all his existing clients to the new franchisee that is also going to use Jim’s Jobs. The newly created database can be restored using the Backup restoration function of Jim’s Jobs.
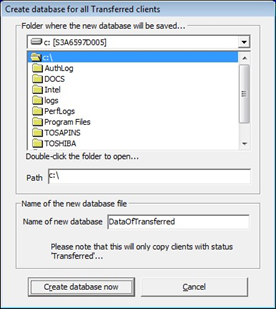
Note: Only the records of those clients with status Transferred will be copied to the new database.
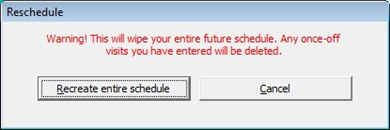
Reschedule
This recreates the entire job schedule of all clients.
Mail Merge Clients
You can mail merge your client details to a newsletter or a seasonal promotion letter to save time addressing them individually and to personalise them.
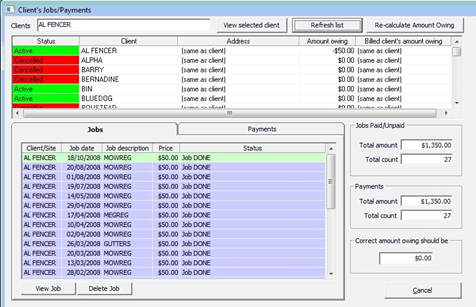
Client’s Jobs and Payments
This screen is useful for tallying the total amount of jobs against the total amount of payments received for a client. This can be especially useful when the amount owing for a particular client or date is suspect
Recalculate GST Component
This recalculates the GST components of all affected records (payments, purchases, jobs...) based on the formula: Value With GST Included * (Tax Percentage / (1 + Tax Percentage)
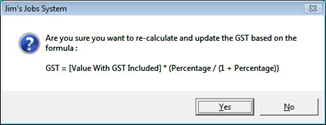
If you are not under GST, set the Tax percentage to 0% in the Miscellaneous settings screen, under Setup.
Recalculate amount owing of all clients
This recalculates the amount owing of all clients based on the formula: Total amount of jobs done – Total amount of payments received
Sort out database records
This function removes unnecessary records in the database. Please ensure you have a recent backup copy of your database before you do this.
Update Billing Name/Display Name
This updates the Billing Name/Display name of all clients in 2 different formats:
Firstname Surname
Surname, Firstname
If you omitted to enter a Firstname or a Surname for any client, then all billing documentation will be blank in that omitted area.
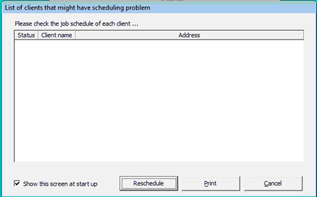
List of clients with a job scheduling problem
One major purpose of this is to avoid getting erratic job schedules. Clients on the list don’t necessarily have erratic schedules. They were added because their schedules don’t match the normal job schedule (e.g. A once-off job or visit was manually added).
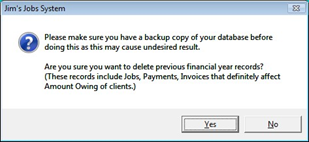
Delete previous financial year records
Ensure that you have saved a backup copy of the database, extreme care should be taken when utilising this function as it may cause undesired results and affect Amount Owing of clients.
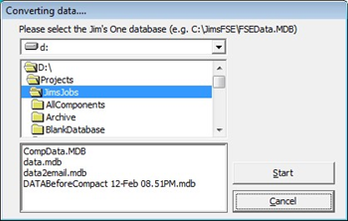
Import data from somewhere
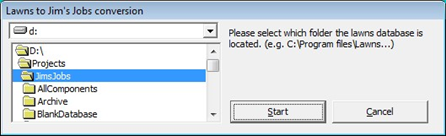
This function transfers data from the other programs being used by other franchisees, which are Lawns and Jim’s One. Since the database formats are different, transfer of data cannot be guaranteed 100% correct. If you use Lawns or Jim’s One, it would be necessary for you to use your system and Jim’s Jobs for a period of time. Don’t leave the other program until you feel confident about using Jim’s Jobs.
To transfer the data from Jim’s One, locate the Jim’s One database. When found, click on Start.
To transfer data from Lawns, locate the Lawns folder. When found, click on Start.
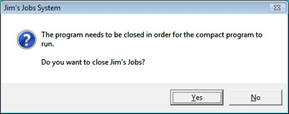
Compact Database
Removes unnecessary records, compressing and repairing the database at the same time. This is a separate program that can be run outside of Jim’s Jobs. The filename is CompactDB.exe usually located in the same folder as Jim’s Jobs.
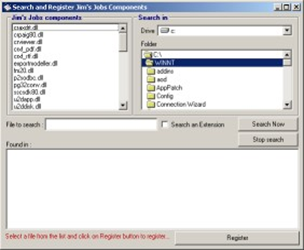
Register components
Register components (RegisterComponents.exe) is a separate program primarily used to register objects or components used by Jim’s Jobs. This is useful when the program consitently shows errors that indicate an object or component is not correctly registered. This also applies when a new component or object was released and requires re-registration to Windows.
8. Setup
Your personal information
The invoices generated in Jims Jobs contain information about yourself and your business in the header. To enter this information, go to Setup and then “Your personal information” .

Note: The terminology shown here is Australia-specific. We are currently working on making them configurable so that the terms will be appropriate for other countries as well.
Services Provided
Jims Jobs is intended to be eventually used by a wide variety of businesses providing a wide range of services. If you need to add your own services into the system, you can do that by going to Setup and then Services provided.
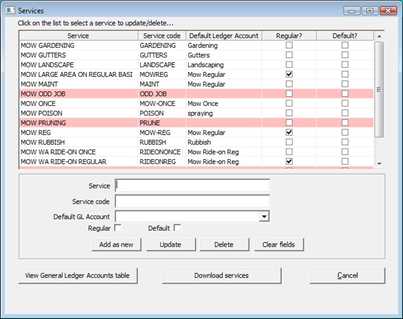
To enter a new service, scroll to the very bottom. The last line will be blank, which allows you to type in the details of the new service there.
Employees
Jims Jobs allows you to manage a number of employees and allocate jobs and clients to them. You can set up your list of employees by going to Setup and then Employees.
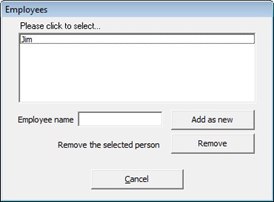
Note: it is strongly recommended that you do not remove any employees from this list, even if you don’t need them. This can lead to data corruption!
Note: if you’ve just added a new employee, it’s a good idea to restart the program to ensure it shows the change everywhere.
You can assign specific clients and specific jobs to each of the employees in this list. In the future, we may provide functions to also manage wages and so on.
You can then view separate run sheets from the Diary by selecting them in the drop down box.
To assign a certain client to an employee, first locate the client on the Find Clients screen, and then select Services and Scheduling tab. You can then select the appropriate employee for the job. Please refer to figure 2.6.
Miscellaneous Settings
This contains various settings used in the program as seen below.
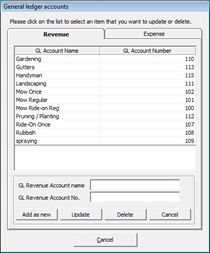
Financial Settings
Select the GL Account for work performed, or if you other services, you can add extra.
Technical Settings
This is only if you need to separate the database for another division.

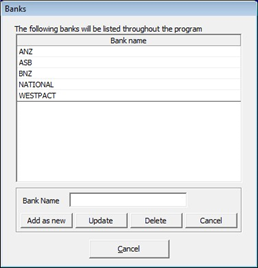
Miscellaneous lists
This section is where you will enter which bank/s you will be using (see below), your schedule of frequency, Payment methods, Divisions, Country (if not Australia) and Holidays.
9. Support and feedback contact details.
InfoTech support.
- Phone 1300 130 490 (Intl +61 3 9496 1427) for 24/7 phone support provided by our Front Line team.
- If they are unable to resolve your enquiry, they will escalate your request.
- Contact InfoTech@jims.net for email support.
- Check https://status.jims.net for any outages.
- For urgent assistance, call the National Office on 61 3 9780 9998, Monday to Friday, 9am to 5pm excluding public holidays.
- If we are unable to take your call, please leave a message and we'll get back to you as soon as we are available.
Feedback
Jims Jobs was originally released in May 2002, and while there have been a couple of alternatives offered, Jim's Jobs Classic remains the preferred solution by the majority of our Franchisees.
Although it is generally running fairly smoothly, we do come across the occasional problem or bug which needs fixing.
So far, Jims Jobs Classic has been improved upon primarily by feedback from you, the Franchisee, and thus we appreciate everyone’s comments and suggestions.
If you have any ideas, suggestions or criticisms, please feel free to email us on infotech@jims.net as any input to improve the system is most welcome.
InfoTech
Jim's Group Pty Ltd.
Related articles